本記事は、開発環境のCloud9からAWSサービスを連携してデプロイすることをゴールにした連載記事です。
Railsアプリをデプロイしよう!!の全体目次はこちらをご覧ください。
本編では、本番環境構築として、本番環境用で作成したEC2インスタンスへssh接続してから進めます。
ssh接続
前編で取得した「キーペア名.pem」をここで利用します。
ローカル環境のDownloadsディレクトリにある前提で進めています。
ターミナル(ローカル)
$ cd ~ ターミナル(ローカル)
#.sshというディレクトリを作成
$ mkdir ~/.ssh
# エラー『 mkdir: /Users/owner/.ssh: File exists 』と表示の場合、すでに存在します
ターミナル(ローカル)
# mvコマンドで、移動させたい対象(ファイル名.pem) → .sshディレクトリに移動します。
$ mv Downloads/ファイル名.pem .ssh/
pemファイルへのアクセス権限を設定します。
ターミナル(ローカル)
# .sshディレクトリへ移動
$ cd ~/.ssh

# ファイル一覧を確認
$ ls

# ファイル一覧から該当のpemファイルをコピーしてアクセス権限を変更
$ chmod 600 ダウンロードした鍵の名前.pem
ターミナル(ローカル)
#ssh接続を
$ ssh -i ~/.ssh/ファイル名.pem ec2-user@ElasticIPアドレス
ターミナルへ下記表示されますが、yesを入力してエンターします。
The authenticity of host '54.199.117.219 (54.199.117.219)' can't be established.
ECDSA key fingerprint is SHA256:YQ0iosgkz2GOzaQficGLuM0jhhZA3NTnPJ+Kg.
Are you sure you want to continue connecting (yes/no/[fingerprint])?
下記のように表示されればOKです。
Warning: Permanently added '54.111.111.111' (ECDSA) to the list of known hosts.

       __|  __|_  )
       _|  (     /   Amazon Linux 2 AMI
      ___|\___|___|

https://aws.amazon.com/amazon-linux-2/
4 package(s) needed for security, out of 16 available
Run "sudo yum update" to apply all updates.
[ec2-user@ip-172-11-11-111 ~]$
各種パッケージのインストール
本番環境のEC2へssh接続します。
ターミナル(ローカル)
#ssh接続
$ ssh -i ~/.ssh/ファイル名.pem ec2-user@ElasticIPアドレス
今回は、データベースをMySQLで進めます。
今回使う本番環境(Amazon Linux 2 AMI)には、MariaDBが既に入っている状態のため、先に取り除いてから進めます。
ターミナル(ssh)
$ sudo yum remove mariadb-libsそして、各パッケージを最新版にしておきます。
ターミナル(ssh)
$ sudo yum -y update続いて、必要なパッケージをいれていきます。
※筆者が開発環境をデプロイした際にエラー解決するために各種パッケージやgemを追加インストールしたため、下記リストはまとめ版です。他の参考サイトでは見られないパッケージやgemがあるのは、エラー対応で必要だったためです。ただし、本当に不要なものもあるかもしれませんので、悪しからず。。
ターミナル(ssh)
#一部不要なパッケージがあるかもしれません
$ sudo yum -y install gdbm-devel openssl-devel readline-devel zlib-devel
$ sudo yum -y install gcc-c++  patch  libyaml-devel libffi-devel libicu-devel libxslt libxml2-devel libxslt-devel
$ sudo yum install libcurl-devel openssl-devel libuuid-devel pulseaudio-libs-devel

$ sudo amazon-linux-extras install epel

#nvmをインストール
$ curl -o- https://raw.githubusercontent.com/nvm-sh/nvm/v0.34.0/install.sh | bash
$ . ~/.nvm/nvm.sh

#インストール可能なバージョンを確認
$ nvm ls-remote | grep v14

# バージョン14のいずれかをインストール
$ nvm install v14.17.5

#このコマンドでバージョンが表示されればOK
$ node -e "console.log('Running Node.js ' + process.version)"

#nodebrewのインストール
$ wget git.io/nodebrew
$ perl nodebrew setup

#yarnインストール
$ wget https://dl.yarnpkg.com/rpm/yarn.repo -O /etc/yum.repos.d/yarn.repo
$ yum install yarn

#バージョン表示されればOK
$ yarn -v

$ sudo yum -y install git
$ git clone https://github.com/sstephenson/rbenv.git ~/.rbenv
$ echo 'export PATH="$HOME/.rbenv/bin:$PATH"' >> ~/.bash_profile
$ echo 'eval "$(rbenv init -)"' >> ~/.bash_profile
$ source .bash_profile
$ git clone https://github.com/sstephenson/ruby-build.git ~/.rbenv/plugins/ruby-build
$ rbenv rehash

#rbenvでインストールできるものを確認
$ rbenv install --list

#開発環境に近いrubyのバージョンをインストール
$ rbenv install 2.6.6
$ rbenv global 2.6.6
$ rbenv rehash

#設定したrubyのバージョンが出力されればOK
$ ruby -v

#下記もそれぞれバージョン表示されればOK
$ node -v
$ npm -v
$ yarn -v

$ gem install bundler
$ gem install unf_ext
MySQLインストール
MySQLをインストールします。
ターミナル(ssh)
$ sudo yum localinstall https://dev.mysql.com/get/mysql80-community-release-el7-3.noarch.rpmターミナル(ssh)
$ sudo yum install --enablerepo=mysql80-community mysql-community-serverターミナル(ssh)
$ sudo yum install --enablerepo=mysql80-community mysql-community-develターミナル(ssh)
$ yum list installed | grep mysqlmysql-community-client.x86_64 8.0.26-1.el7 @mysql80-community
mysql-community-client-plugins.x86_64 8.0.26-1.el7 @mysql80-community
mysql-community-common.x86_64 8.0.26-1.el7 @mysql80-community
mysql-community-devel.x86_64 8.0.26-1.el7 @mysql80-community
mysql-community-libs.x86_64 8.0.26-1.el7 @mysql80-community
mysql-community-server.x86_64 8.0.26-1.el7 @mysql80-community
mysql80-community-release.noarch el7-3 installed 上記の結果がでればMySQLはインストールされています。
続いて、次のコマンドでRDSのMySQLへログインします。
ターミナル(ssh)
$ mysql -h エンドポイント -u root -p
#コマンド後にパスワードを入力してエンター
Welcome to the MySQL monitor. Commands end with ; or \g.
Your MySQL connection id is 8
Server version: 5.7.34-log Source distribution
Copyright (c) 2000, 2021, Oracle and/or its affiliates.
Oracle is a registered trademark of Oracle Corporation and/or its
affiliates. Other names may be trademarks of their respective
owners.
Type 'help;' or '\h' for help. Type '\c' to clear the current input statement.
mysql>上記の結果がでれば、ログイン成功です。
下記のコマンドで作成したデータベース名がでてくればOKです。
ターミナル(ssh)
mysql> show databases;mysql> show databases;
+--------------------+
| Database |
+--------------------+
| information_schema |
| dc_production |
| innodb |
| mysql |
| performance_schema |
| sys |
+--------------------+
6 rows in set (0.00 sec)下記コマンドでログアウトします。
ターミナル(ssh)
mysql> exitNginxのインストール
Nginxをインストールします。
ターミナル(ssh)
$ sudo amazon-linux-extras install -y nginx1
$ sudo systemctl start nginx
$ sudo systemctl enable nginx
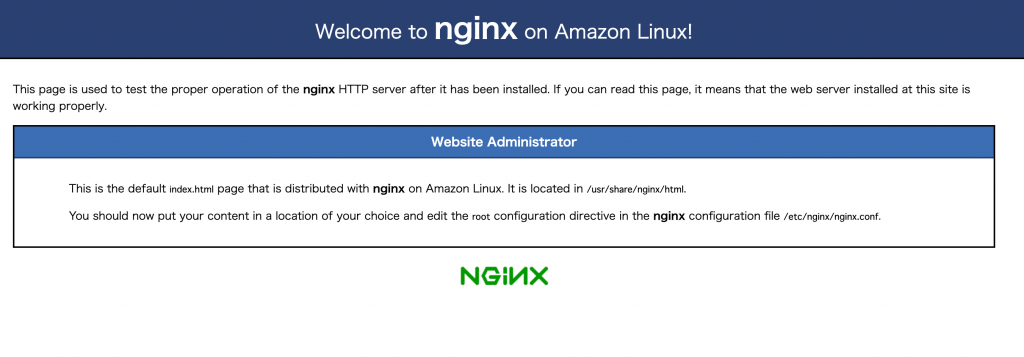
ブラウザにElastic IPを入力してアクセスすると

この画面が表示さあれればOKです。
続いて、設定ファイルを作成します。
ターミナル(ssh)
$ sudo vi /etc/nginx/conf.d/DC_product.confi を押して下記にて設定します。(適宜変更してください)
# log directory
error_log  /var/www/rails/DC_product/log/nginx.error.log; #自分のアプリケーション名に変更
access_log /var/www/rails/DC_product/log/nginx.access.log; #自分のアプリケーション名に変更


# max body size
client_max_body_size 2G;
upstream app_server {
  # for UNIX domain socket setups
  server unix:/var/www/rails/DC_product/run/sockets/unicorn.sock fail_timeout=0; #自分のアプリケーション名に変更
}
server {
  listen 80;

  server_name 54.****.****; #ElasticIP

  # nginx so increasing this is generally safe...
  keepalive_timeout 5;
  # path for static files
  root /var/www/rails/DC_product/public; #自分のアプリケーション名に変更
  # page cache loading
  try_files $uri/index.html $uri.html $uri @app;

  location @app {
    # HTTP headers
    proxy_set_header X-Forwarded-For $proxy_add_x_forwarded_for;
    proxy_set_header Host $http_host;
    proxy_redirect off;
    proxy_pass http://app_server;
  }

  # Rails error pages
  error_page 500 502 503 504 /500.html;
  location = /500.html {
    root /var/www/rails/DC_product/public; #自分のアプリケーション名に変更
  }
}
編集後、esc を押して、:wq で上書き保存します。
Nginxを再起動させます。
ターミナル(ssh)
#設定を反映させます
$ sudo nginx -s reload
$ sudo systemctl restart nginx
マスターキー設定
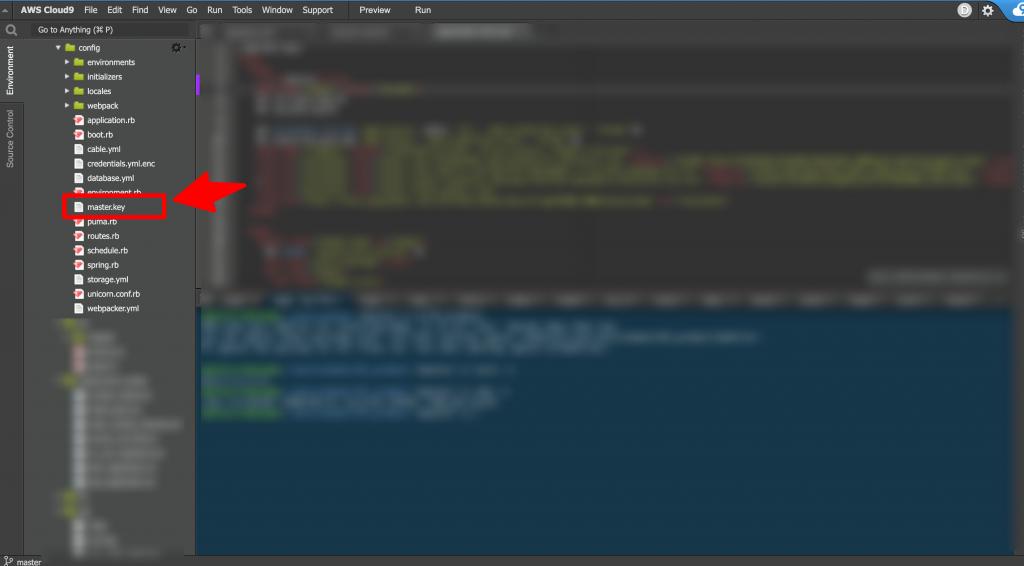
開発環境でcredentials.yml.encを使用している場合、本番環境でマスターキーを事前に設定しておく必要があります。
マスターキーというのは、開発環境のconfig配下にあるmaster.keyファイルの中に入っている文字列のことです。

ターミナル(ssh)
# .bash_profileに環境変数 RAILS_MASTER_KEY を設定
$ echo 'export RAILS_MASTER_KEY="*****"' >> ~/.bash_profile

#直接編集してもOK
# sudo vi ~/.bash_profile

# sourceで変更内容を反映
$ source ~/.bash_profile

#環境変数を確認できます。設定した RAILS_MASTER_KEY=***** があればOK
$ printenv

#Nginx再起動
$ sudo systemctl restart nginx
参考URL
時間設定
本番環境の時間を日本時間に変更します。
ターミナル(ssh)
#現在の設定時刻の確認
$ date

#タイムゾーンをJSTに設定
$ sudo ln -sf /usr/share/zoneinfo/Asia/Tokyo /etc/localtime

#/etc/sysconfig/clockの設定変更を変更
$ sudo vi /etc/sysconfig/clock
#ZONEを書き換えます
ZONE="Asia/Tokyo"
UTC=trueターミナル(ssh)
#再起動
$ sudo reboot
本編は以上です。お疲れ様でした。

